

Red Velvet Cake with Classic Cream Cheese Rosettes…!! Love, Romance, & Flavour in a piece of cake…


Tips for making Rosette:
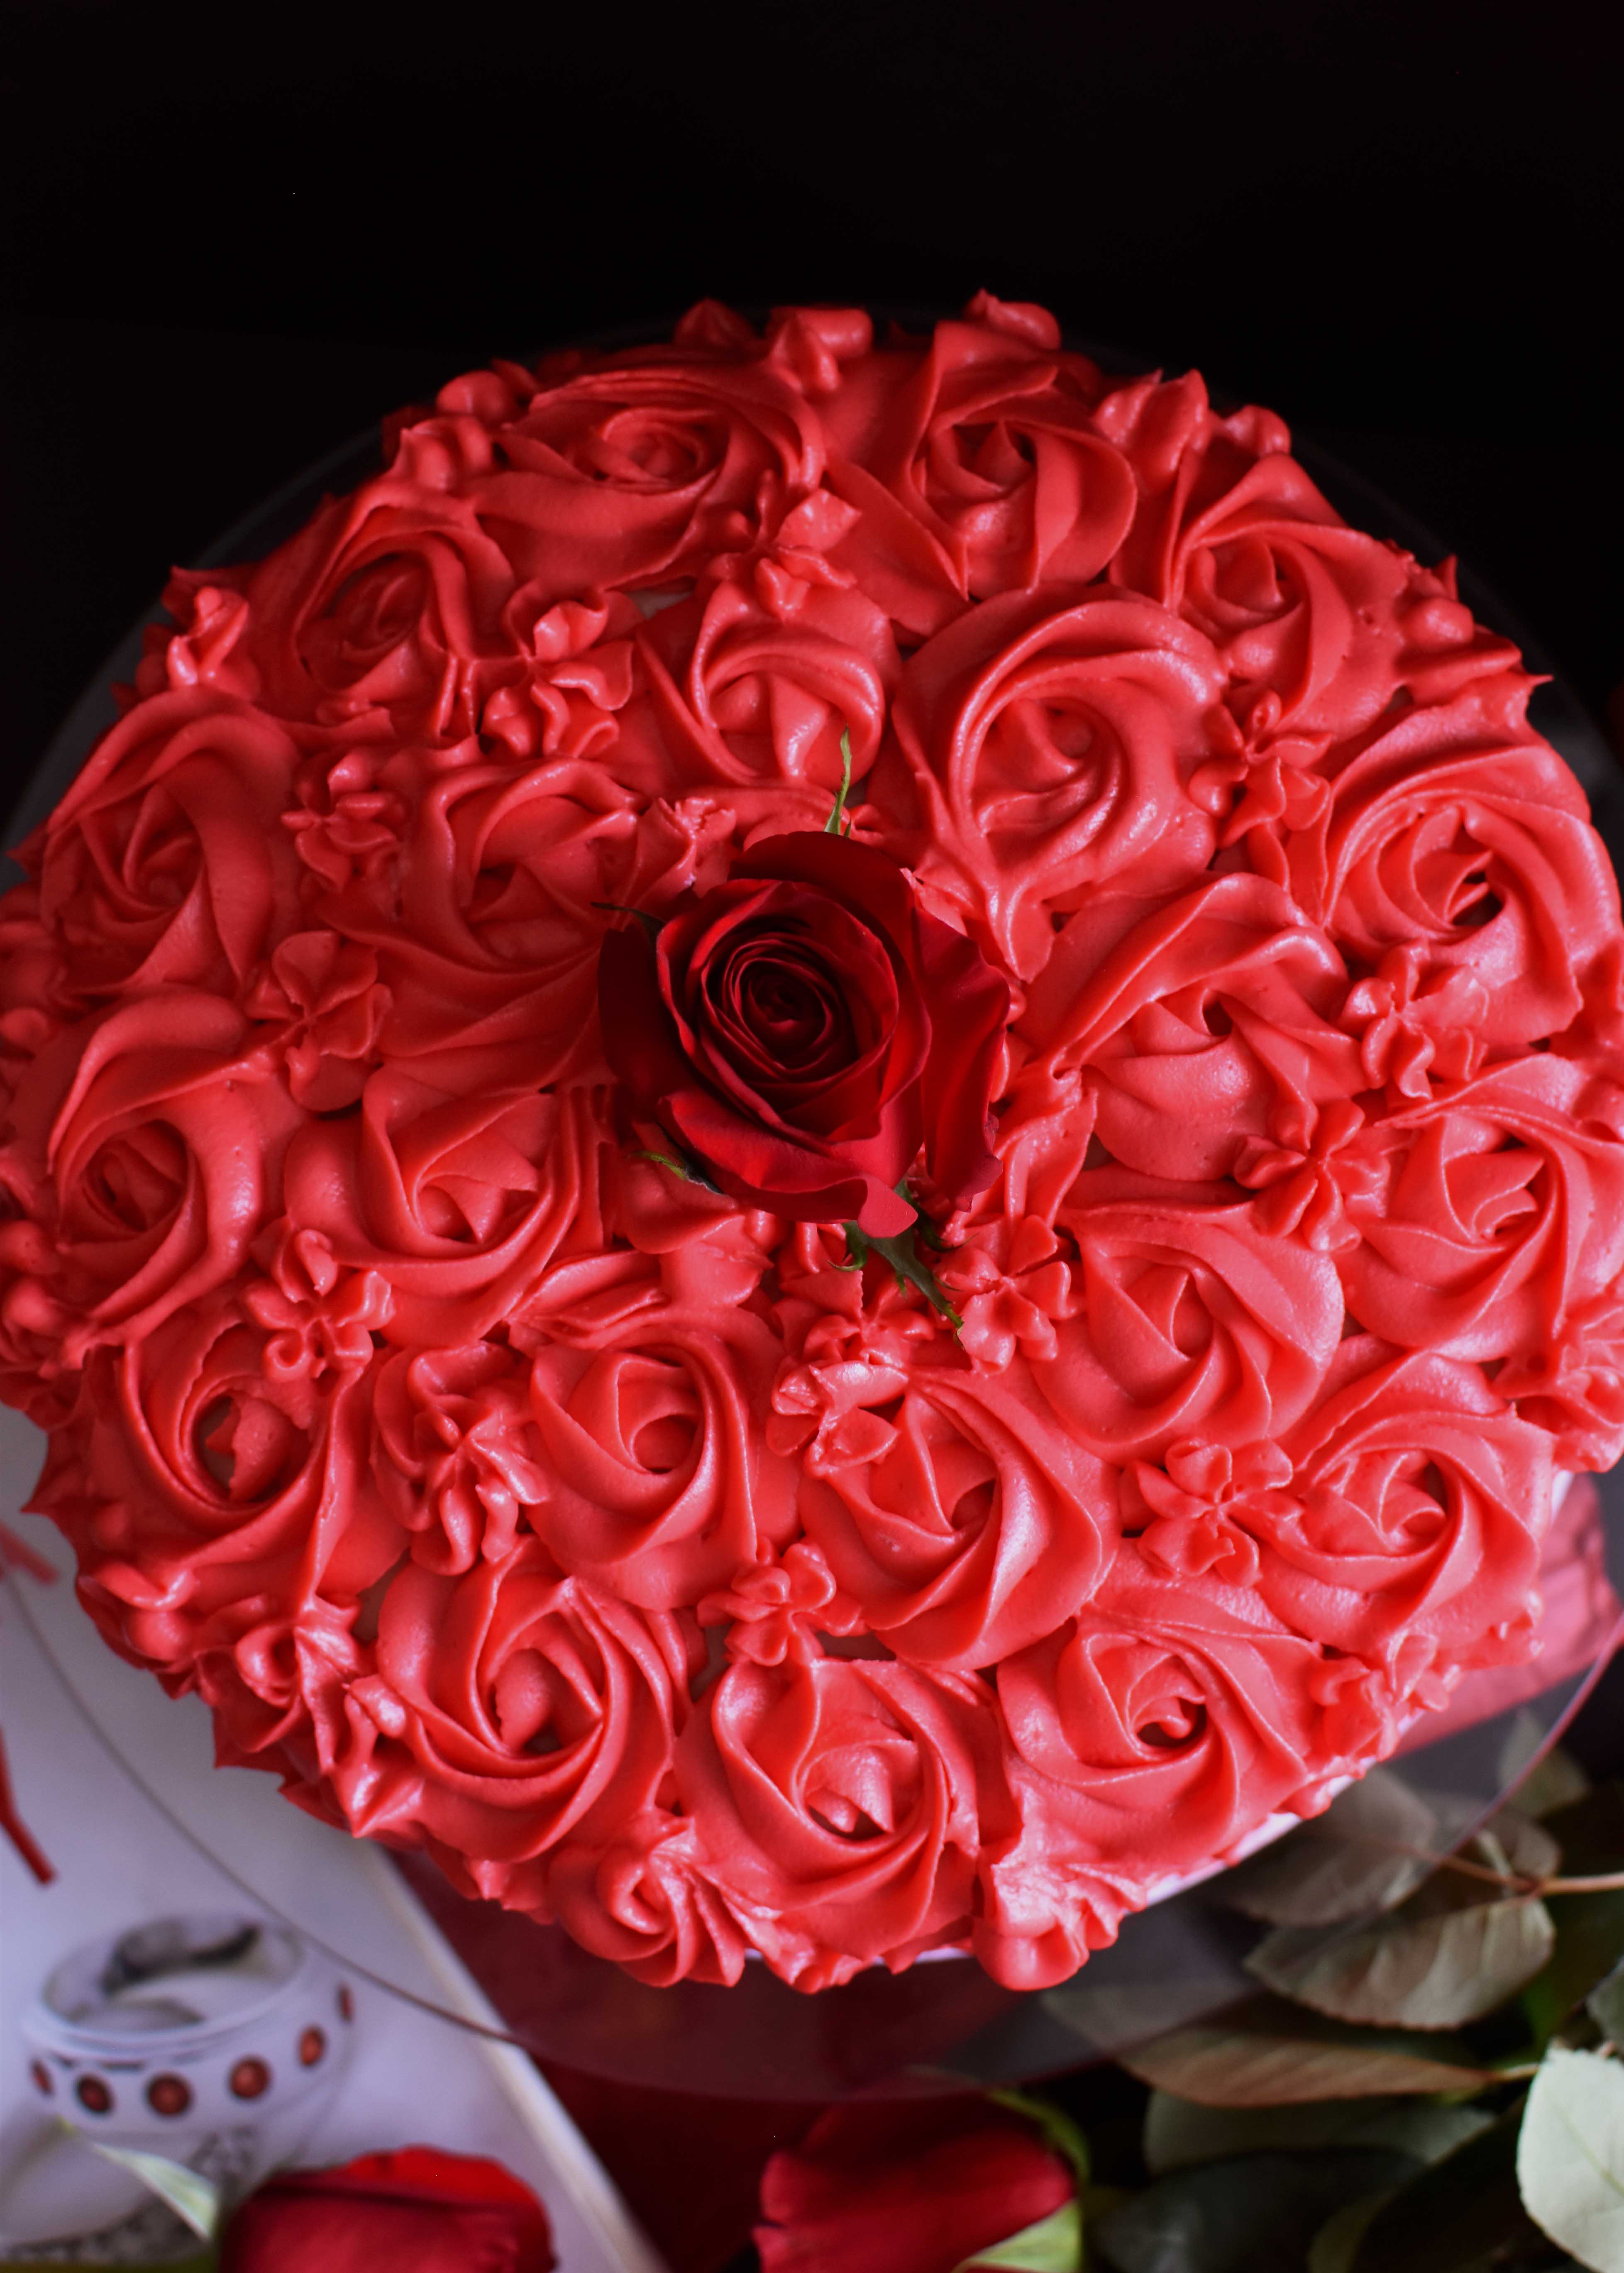
- I used a Wilton 1M/2D rose tip to decorate the roses.
- It is ideal to chill your frosting for 15 minutes in the refrigerator before you pipe, so that your rosette stands firm.
- If your frosting turns out to be too thick, add a few drops of milk and beat till you get the perfect consistency.
- Make sure you have enough frosting to pipe the roses. Sometimes these roses take a lot of frosting, so be prepared for it. The measurements which I have provided here is enough for two 9inch round cakes as seen in my pictures.
- I highly recommend you practice the roses on a flat surface first to avoid any mistakes before decorating the cake, especially if you are a newbie like me.
- Always start decorating from the bottom of the cake. It is easier to clean up any mistakes or mess from the bottom. If your roses start to slide down, chill the frosting for another 15 minutes to set and redo.
- To decorate the roses; gently pipe a center point, and start moving the tip in a circle, counter clockwise direction, and repeat the process. Pipe your roses tightly leaving no gaps between them. Fill the spaces in-between by piping a dot or a flower bud.
- When you are done with decoration, chill your cake for another 30 minutes to allow the frosting to set completely.


Follow me on Instagram, try out the recipes and tag #pepperdelightblog to all your pictures of Pepper Delight recipes you prepare.


Red Velvet Cake with Classic Cream Cheese Rosettes...!!
- 2⅔ cup all-purpose flour
- ⅓ cup corn starch
- 2 tbsp unsweetened cocoa powder
- ½ tsp salt
- ½ cup unsalted butter (softened at room temperature)
- 2 cups granulated sugar
- ¾ cup vegetable oil
- 1½ tbsp vanilla extract
- 4 large eggs (separated – at room temperature)
- 1 tsp distilled white vinegar
- 3½ tbsp liquid red food color
- 1 cup buttermilk (at room temperature)
- 16 oz + 8oz full fat cream cheese (softened at room temperature)
- 6 cups powdered sugar (sifted)
- ½ cup + 4 tbsp unsalted butter (softened at room temperature)
- 2 tsp vanilla extract
- 1 tbsp milk
- 4 tsp liquid red food color
-
Preheat oven to 350 degrees F.
-
Apply butter on two 9 inch cake pans and set aside.
-
In a small bowl, sift and mix dry ingredients; flour, baking soda, cocoa powder and salt. Set aside.
-
In a large bowl, using a hand mixer or a stand mixer, beat butter on high speed until smooth and creamy (1 min).
-
Add granulated sugar, beat for another 2 mins to mix.
-
Add oil and beat on high for 2 mins. Scrape down the sides of the bowl if necessary.
-
While beating on high speed, add the vanilla extract and egg yolks. Beat well to mix properly.
-
Add the red food color slowly along with vinegar, beat well to mix and give the batter a proper red color.
-
Add the dry ingredient mix at this stage, slowly alternating with buttermilk and flour on a low speed. Do not over mix the batter.
-
In the meantime, beat the egg whites in another bowl vigorously until soft peaks form (3 mins). The peaks should hold their shape when beaters are lifted.
-
Fold in the cake batter using a rubber spatula. The batter will be smooth and thick.
-
Pour the batter equally into the prepared pans, Bake for about 30 – 32 minutes, until a toothpick inserted in the center comes out clean.
-
Allow the cake to cool on a wire rack for 15 minutes.
-
Unmold the cakes by running a knife or a rubber spatula over the sides of the pan. Carefully flip them over.
-
Beat cream cheese (8oz) and butter (4 tbsp) on a medium speed and until smooth.
-
Beat in sugar (2 cups), vanilla extract (1 tbsp) and milk (1tbsp) on a high speed for another 3 minutes.
-
Level the top surface of the bottom cake by shaving off the uneven portions.
-
Apply a thick base coat of frosting evenly using a spatula on top of the shaved cake surface. Sandwich the second cake on top of it and apply the base coat on the top and sides of both cakes. Allow it to set in the refrigerator for about 30 minutes.
-
Beat cream cheese (16oz) and butter (½ cup) on medium speed until smooth.
-
Beat in sugar (4 cups), vanilla extract (1 tbsp) on a low speed, and slowly increase speed to medium, beat for 3 minutes.
-
Add liquid red food color (4 tsp) at this stage; beat on low for another 1-2 minutes. This gives a bright pink color as seen in the picture. If you want to go for light pink shade, cut down the red food color to 2 tsp.
-
Chill in the refrigerator for 15 minutes. This helps to pipe the roses nicely.
- Make sure your eggs, butter, buttermilk and cream cheese are brought to a room temperature. Otherwise it will affect the texture of the cake.
- When you mix oil with butter, it may not combine well but that’s completely okay. It will melt inside while baking.
- Always use fresh eggs and while beating the egg whites, do so till soft peaks are properly formed and hold their shape when lifting the beater.
- I used 4 tsp of liquid red food color to get a bright pink color for my frosting. If you prefer light pink, cut down to 2 tsp. If you do not want any color, make sure you thin the frosting by adding milk to get the right consistency.